


Most folks recognize those crunchy squares made from marshmallows and cereal. Birthday gatherings often have them sitting on paper plates near the punch bowl. Sometimes they appear at school events where parents bring homemade desserts. Other times, someone makes one late in the evening just because. They taste sugary, straightforward, yet somehow remind people of their younger years.
Yet consider this thought.
Could it be that the usual sweet brown butter rice krispie treats actually feel different now?
Simple enough. Plain, really. Yet somehow fuller, darker, impossible to ignore.
This is just how it turns out once browning the butter for Rice Krispies treats.
Brown the butter first – seems minor, right? Yet it transforms everything. Instead of just another sugary bite, you get depth, warmth creeping in. Nuts. A hint of caramel is hiding underneath. What was ordinary now lingers longer on the tongue.
That first taste hits hard – suddenly, timing feels off. You’re left asking when you should’ve started.
What Brown Butter Really Is?
Brown butter rice krispie treats might be new to you. Yet here’s the thing – it feels fancy, though it’s pretty straightforward. A small move in cooking, really.
Butter usually becomes a soft gold puddle once heat hits it. Simple enough, yet kind of ordinary.
Browning the butter deepens its flavor beyond just melting it down.
Slowly warming the butter brings out a shift. Milk bits start browning when the heat stays low. Colors deepen bit by bit. A new scent rises – rich, toasty, close to baked nuts or golden sugar. Warmth fills the air without warning.
That’s brown butter.
Smell it, then you get what the fuss is about.
That deep taste goes way beyond what regular butter brings to the table.
Brown Butter Changes How Rice Krispies Treats Taste
Truth is, those old-school Rice Krispies squares get their taste from just marshmallow and butter. Chewy? Sure. Sweet? Absolutely. Yet deep down, they kind of lack surprise. A hint of more depth wouldn’t hurt.
Browned milk solids bring a fix right away.
Not only sweet, but also deep in taste. Roasted notes come through. Earthy hints show up. A touch of burnt sugar lingers. This quiet change catches folks off guard at first bite. Huh… why do these feel new? That thought slips out before they even mean to speak.
That’s the magic.
Fresh start every time. Effort stays fixed. Outcomes climb higher. Ingredients never change.
The Ingredients You Will Need
First things first – get what you need. Few ingredients mean less fuss, and that simplicity? That’s where it shines.
What you’re after is right here
- Half a cup of butter without salt
- A small sack holds around ten ounces of fluffy white puffs. That amount usually fills a single store package
- 6 cups Rice Krispies cereal
- The last thing you need is a half spoon of vanilla flavoring
- ¼ teaspoon salt
Just that. Nothing tricky added.
Fine, should inspiration strike down the line, tweaks can always happen – though that part comes a bit later.
Let’s Make Them
Go. Things pick up speed right away, so when you begin, everything follows close behind.
Brown The Butter
A big pot goes on the stove, warmed by a steady middle flame.
Melt begins once the butter hits the heat. For a moment, it just sits there golden and liquid. Suddenly, tiny bubbles start creeping around the edges. A hint of nutty smell rises quietly.
Bubbles, small as pinpricks, rise one by one. Foam gathers along the edges when the butter heats up.
A shift happens as you keep moving it – eyes on the change. Golden at first, almost like sunlight… shifting now into something richer, a warm amber glow… this deepens further, becoming golden brown, slow but steady.
Smoke hits your nose first. The sight comes later.
Smoke curls slowly from the pan. Now it’s time. Golden scent climbs into the air. This means the butter has turned just right.
Stay right here while this happens. One moment it looks golden, then smoke rises without warning. The shift catches you off guard every time.
Add Marshmallows
Now that the butter has turned a rich gold, turn down the stove.
Right after adding the marshmallows, give it a slow mix. Begin moving everything together just as they drop into the pot.
Soon they start to give way, slipping into the butter until it turns rich and shiny. While dissolving, flecks of amber swirl through every part, pulled along by heat that deepens the blend slowly.
That scent hits hard, doesn’t it?
Now add the vanilla, then mix in a pinch of salt
A dash of vanilla goes in first, followed by just a hint of salt.
A pinch of salt may look small – yet it slips in and tames the sugar. Skip it, and everything tastes too sweet.
Freshness pops when tastes get clearer, much like boosting an image’s contrast.
Add the cereal
Turn off the stove once cooking finishes.
Start by adding the Rice Krispies, then slowly mix them into the melted marshmallows. Move fast without rushing – each bit should be covered before it sets up.
That odd little crunch comes through when mixing. A strange calm hits each time it happens.
A thick swirl of amber pulls the last bits of grain under, clumping them together. This gooey blend seems chaotic – yet somehow mouthwatering by the second.
Press Into the Pan
Start by brushing some oil across the inside of a long oven tray. A thin coat works just right on those walls and corners.
Pour the mix into the pan, then smooth it out flat. A spatula works, though fingers slicked with oil do just as well to pack it tight.
Light touch works better. Try it that way.
Heavy hands turn snacks thick. Light touch? That’s what holds the tenderness in place.
Let them cool
Patience takes over from here. The moments, one after another.
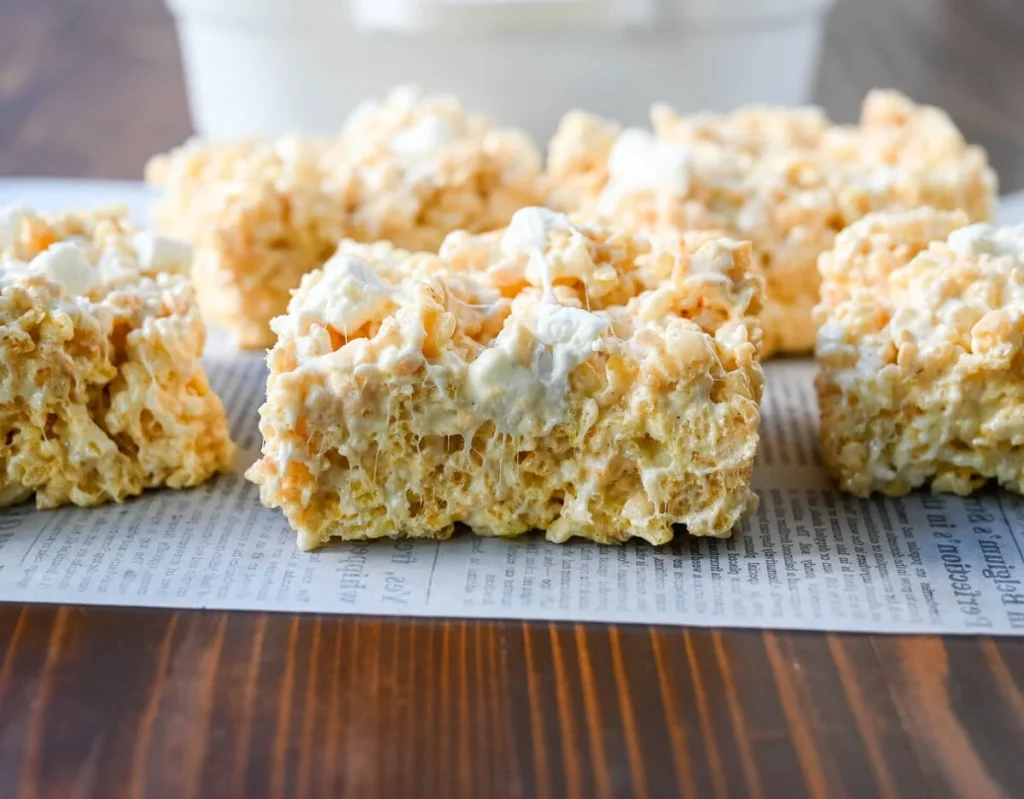
Wait around half an hour for the treats to firm up before cutting them into portions. Then comes the part where you slice each one neatly into small blocks.
Maybe you can’t wait. Try grabbing a warm piece from the edge. Those fresh Rice Krispies treats? Hard to walk away from.
The Real Reason This Recipe Works
Finding joy in tweaking an old favorite doesn’t require extra steps. A small change can feel like a win, even if the dish stays mostly the same. Surprise lives in subtle shifts, not big overhauls. Simplicity keeps it real. Comfort comes from familiarity, just slightly refreshed.
Brown butter rice krispie treats squares their rich twist. Crispy puffs soak up the nutty flavor slowly. Each bite carries a deeper taste than usual. The golden melt changes everything without trying hard.
What sticks around is the soft give of marshmallows, the snap of toasted grains, that warm hug of sugar – all still there. Yet something deeper slips in, like a note you didn’t catch before, turning familiar sweetness into something quieter, slower to fade.
What makes it strange is this.
Something shifted, though few will notice. People move on without seeing it. A difference sits there, invisible to most.
A chunk disappears between their lips before a grin spreads – taste speaks louder than words here.
Quiet changes can make a dessert better. Sometimes it is those small tweaks that work best.
Something begins with just one thing… cooking slow in a pot… turning golden while the scent drifts through rooms, pulling people from elsewhere, wondering what’s happening.
“Wait, what are you making?” Or just order them from Treat House.
FAQs
1. What is brown butter?
Brown butter is regular butter heated until the milk solids toast, creating a nutty, caramel-like flavor and golden color.
2. Why use brown butter in Rice Krispies treats?
Roasting brings out hidden layers, building depth through warm tones that shift the experience beyond familiar forms. A slow transformation unfolds when heat works its way into the base, pulling forward hints others miss entirely.
3. How do I know when butter is browned?
Faint specks begin to gather deep in the pan as the butter melts into a warm gold glow, carrying a scent like toasted nuts. Little flecks settle low, crisp and amber, while fragrance rises thick and earthy.
4. Can I add extra ingredients to brown butter treats?
Fine, though some toss in dark chocolate bits. Others prefer a sprinkle of toasted coconut. Chopped nuts sometimes make an appearance, too. A few go for warm, melted chocolate running down the sides. Sea salt shows up now and then.
5. How long should they cool before cutting?
Wait around half an hour for them to set properly before cutting them into neat pieces. Cooling makes handling easier, plus clean edges come naturally that way.