Brands, organizations, and fashion-forward individuals actively use embroidered patches to achieve their distinctive goals. You can do it, too, when you choose the right design for your patchwork. Designing is a lengthy process, requiring one to choose complementing elements to craft a striking design.
If you’re new to all this, we have listed ten effective tips that would help you successfully sail through in this case. Even if you hire online designers, acquainting yourself with the following tactics will let you communicate your expectations. Hence, you would get your final product just as you imagined.
10 Expert Tips To Design Embroidered Patches
1. Choose Strong Color Contrast
Strong colour contrast works way better than dark-on-dark or light-on-light hues. The reason behind this is that readability is compromised if both shades are either darker or lighter in tone. Therefore, you should select a dark light. Otherwise, a bright one over the solid shade to make the text on your embroidered patch readable.
The only exceptions to this case are black-on-white or white-on-black, but this colour scheme can offer you a poor-quality badge. Hire a top-notch and trusted online manufacturer that saves you from committing blunders while designing. They will address all your concerns and deliver you a top-quality and perfectly personalized emblem.
2. Avoid Excessive Trimming And Choose Close Placement
The needle should travel from one element to another within the design. It not only decreases the duration needed for designing but also minimizes the chances of embroidery errors. So, make sure all your elements touch or are very close to each other, creating a cohesive connection. It will make it easier for the embroidery machine to stop, trim, and let it move to the next position quicker to resume stitching.
3. The Bold, The Better
Bold letters and design elements come out with a polished look and high readability on the embroidered patches. Consider them to bring a visible change into your design and make it stand out from others. Choose a big size for your letters, as small ones are not visible from a distance, regardless of how well you embroider them.
Avoid thin or tiny typography as much as you can to make your motif’s text visible even from a distance. Considering this tip is crucial for businesses and organizations aiming to spread their word and spread awareness. Serifs and freehand styles are the ideal bold letters for embroidering, in case you’re wondering.
4. Choose Embroidery Friendly Position
If you’re going for a typical shape for your embroidery badge, you may choose a round, square, or rectangular. The size of your piece may also differ depending on the goal you want to achieve with it. Whether you aim to include a few or more elements, choose a placement that makes all your graphic components pop.
Experiment with the design by making changes to it to get an idea of where the logo, text, and other graphic elements would appear attractive. Once you explore different placement areas, you will be able to create a dazzling design.
5. Select Minimum Size ⅛″ Lettering
The letter smaller than ⅛″ of an inch of the embroidery badge compromises the readability. In case, you use both upper and lower case letters, the least size would depend on your lower case letters. The minimum size of lettering for a small emblem is 0.25” high. Additionally, simple typographic fonts, such as Helvetica or Arial, are the standard for petite text, as they are easy to read.
6. Be Careful Of Thin Black Lines
Too many black lines around graphic elements can ruin your badge’s design. To avoid such a mistake, remove as many charcoal outlines that separate elements within your custom embroidered patches as you can. It will improve the appeal of your finished product. Another form of it is a capture line, which is a thin outline that defines graphic details within the design. They are a series of short, straight stitches that are difficult to see when embroidering.
You may think that they’re not the straightest or smoothest-looking line, but they appear sloppy. Therefore, we suggest you avoid such lines within your design whenever possible to animate your badge’s appeal. However, they’re worth including in some cases, such as when you include cartoon characters.
7. Make Smooth And Consistent Stitches
Stiehl stitch is one of the smoothest and most consistent forms of stitching that you should consider. You can adjust its thickness to create a compelling effect. Otherwise, you may create a small and large stitch at a time; this inconsistency would result in a choppy look.
8. Say No To Blank Spaces
Blank spaces may appear boring and make the overall artwork dull. So, you should master ways to effectively leverage empty areas. Enlarge graphic elements, extend text, and introduce graphic elements to make the right use of blank spaces. In other words, we suggest you adjust the size and placement of your visual elements to avoid blank spaces and create a visually appealing look.
9. Select A Complimenting Border
Select an Overlock Edge border, aka Merrow® border, if you want to create a classic patch look. This type is made from the Merrow overlock sewing machine, hence named after its name. It is an ideal choice for simple emblems. Choose contrasting colours for your badge’s border to craft an appealing patchwork.
Pick a solid-coloured frame around your emblem, as it would offer a clean look without overpowering the main elements. This idea is particularly effective if your patchwork is intricate. These days, there is a growing trend of pieced borders for large motifs and it is harmonious with the overall. It includes sewing smaller fabric pieces together that contrast well with each other. You can consider leftover cloth pieces or gather them from the scrap.
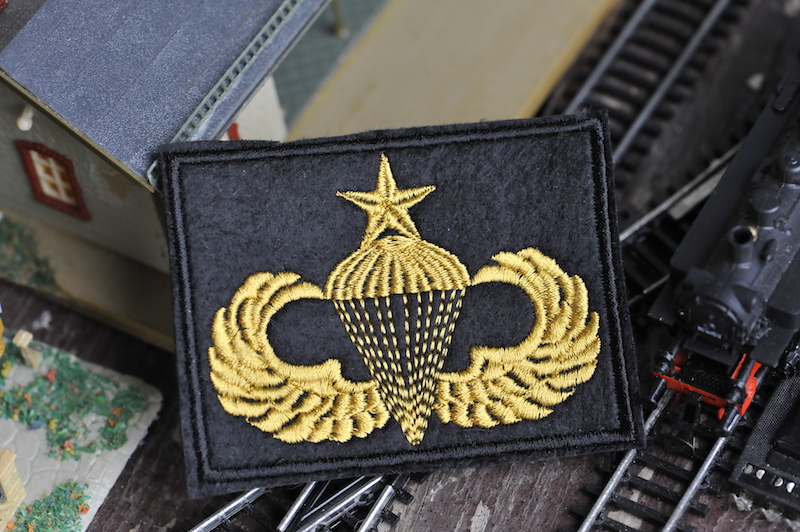
10. Embrace Metallics To Your Basic Threads
Metallic threads are the best solution if you want to embrace an extraordinary touch to your custom embroidery badges. They are the perfect choice for adding beauty to logos and taking the charm of emblems to another level. Whether you include silver, gold, or neon metallic thread, it would uplift your brand logo and enhance your branding.
Final Verdict
These ten effective tips will help you create a compelling design for your embroidered patches. Whether you craft one for yourself or a professional design, implementing these strategies would set your badge apart. Avoid any mistakes while following them to achieve the best results. Thus, you would be able to achieve your personalizationor branding goals through it.