You might be getting nostalgic over your childhood games and feel like you want to play them again. The real question arises is, how an individual could get an access to the high-quality image by the GameCube (if the GameCube doesn’t have an HDTV image if its displayed-on television). Don’t be anxious, because in this article you will easily connect your GameCube to HDTV without any hassle.
Let’s get started on how to connect your GameCube to a HDTV!
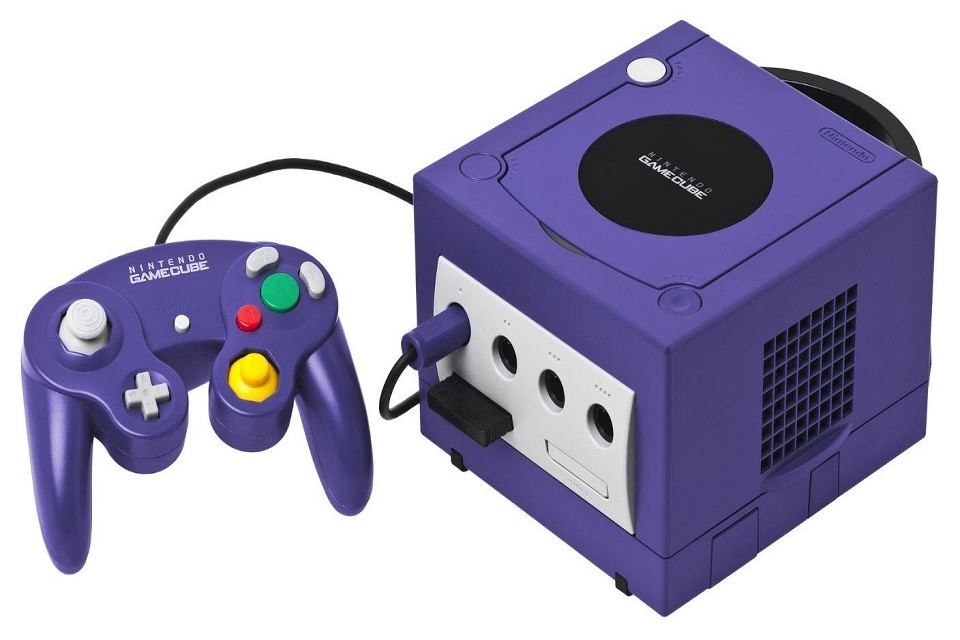
What is GameCube?
The Nintendo GameCube was released by Nintendo in Japan on September 14, 2001, and in North America on November 18, 2001, moreover, it’s a home video game console. It is the successor to the Nintendo 64 and it was an entry in the sixth generation of video game consoles. Both Microsoft’s Xbox and Sony’s PlayStation 2 compete with GameCube. The GameCube is the first to use a primary storage medium and it’s the first Nintendo console to use optical discs. Moreover, it is focused mainly on gaming instead unlike its competitors the system was not designed to play full-sized DVDs or audio CDs, the discs are in miniDVD-based format. The GameCube HD cable works perfectly with TV and provides the best signals for displaying high-quality display pictures. The standard 480 lines of resolution on HDTV would be displayed as the image of the game.
How to connect your GameCube to HDTV?
The GameCube does not have the HD quality image, which is why it needs a cable to connect to it. There is a detailed process through which this could happen.
RCA JACKS are also known as the Audio/video Input jacks. Now, at the back of your TV you can place the Yellow (Video) cable into the Video IN. Prior to it the Audio/video INPUT jacks on the TV should be located. Next step is to connect the audio left (white cable) to the audio IN left and then connect the RED (audio on the right cable) to the Audio IN right, one could also leave the white cable disconnected instead (as the Y-adapter pictured is optional). Further, at the back of the control deck you can attach the Rectangular (Gray) plug of the Stereo AV Cable into the Analog AV Out port.
After the system’s hooked-up to the TV
The space around the side vents in the system is an important aspect. Look if the power button is switched OFF, if not then so. Then, at the back of the system into the DC 12V In port (fits only one way), the AC adapter should be plugged IN, so into the wall outlet try to plug the other end too.
Further, beginning from the far-left port on the front of the GCN, you need to hook-up the controller. To open the Disc Cover, press the ‘Open’ button, then on the centre hub you can insert a Game Disc, printed side up, into the compartment. Until the Game Disc locks on the centre hub, press down gently on it.
Closes the disc cover, check that power light comes on, after you press the Power button Nintendo GameCube. Locate the input select and turn on the TV. Here is the sequential steps which one needs to follow, input select, AUX (auxiliary), Line, Line In, Input, Source, Select, In, or EXT (external) of the system. Furthermore, followed by the game’s main menu, the Nintendo GameCube logo should appear on the screen.
Now you can easily play one of the top favourite games from GameCube which are, Super Smash Bros: Melee, and the one true Mario Kart game: Double Dash, Paper Mario: The Thousand-Year Door, Star Wars: Jedi Knight, Legend of Zelda: The Wind Waker.
The choice is all yours! Go for the best game you have longed to play for a long time.
Final Thoughts
Many people might get agitated while thinking about connecting the GameCube to their HDTV, although it appears to be quite a hack. If you are still confused, Try to go through the detailed version of articles which explains how to operate your favourite games with 480 of resolution without facing any slightest problem!