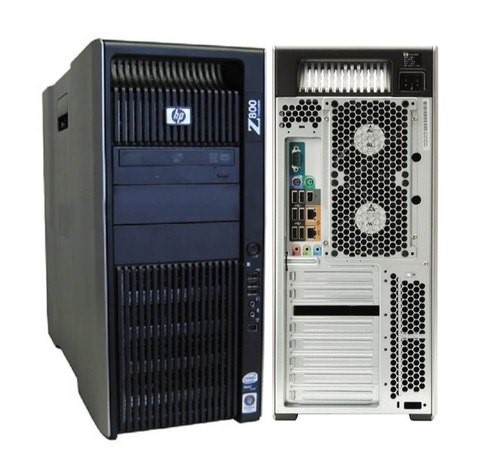
This a dual Xeon 48 gig beast for under $700 buckle up because it wasn’t easy hint because of these two guys now I think the best place to start this story is with the purchase of my first HP z 800 server look at me here talking all proudly about my new purchase now the refurbished processor india did tell me that it wasn’t working and he cited power supply issues as the problem and then with a quick google of HP’s at 800 power supply issues there seems to be a very common issue with capacitors going bad in these power supplies.
it seems to be fairly user serviceable so I bought the PC and what I actually got it I opened up the power supply and obviously I had no idea what was going on inside there wasn’t like an obviously burst capacitor or anything like that so I decided I and I’m quite embarrassed to admit this but I actually called HP’s customer service hotline and started asking the lady about how to actually diagnose a broken capacitor in one of these power supplies quite understandably the lady was really confused as to why I was digging around the insides of one of their power supplies and then she in a very matter-of-fact tone of voice said well.
how do you know the power supply is broken and she was right obviously how did I know the power supply was broken so I went through all of the steps of diagnosing what was wrong with the Machine and then I ended up realizing that the motherboard power supply cable wasn’t making proper contact and when I pulled it out a little bit the PC action he switched on so then I pushed it back in hoping that it would continue to work because you know it would have proper contact now or whatever and well it didn’t so when I started fishing around for that point where it switched on again I accidentally set fire to a graphics card rest in peace my good.
Destroying you in your prime really catching on fire isn’t the most ideal way to die and at this point I was actually worried that I had destroyed both of the Zeon X 56 75 CPUs as well and all 48 gigs of RAM but I decided to power ahead with my endeavour anyway.
So then I started to look for a different solution and weirdly enough the easiest one was also the cheapest one I found a website that sells refurbished old HP servers and they per grudgingly sold me an HP z800 server with no CPUs and no Ram unit.
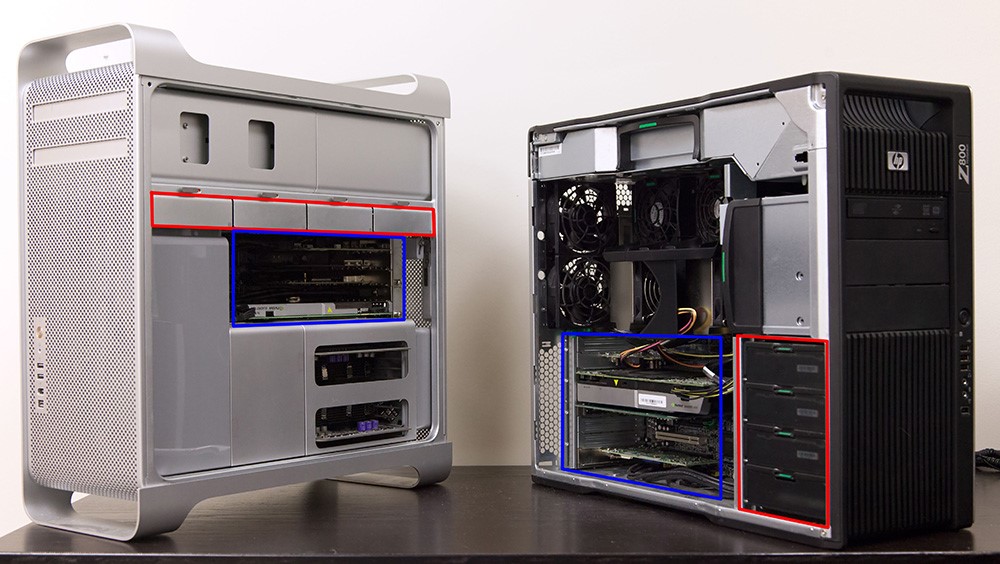
Which is like the only components I really cared about the first PC and they actually sold it to me for less money than just buying a Hz 800 power supply off of xfurbish and this actually brings me to the build portion and with that it’s time to actually see whether the conglomeration of the components between the two machines actually works and our first things.
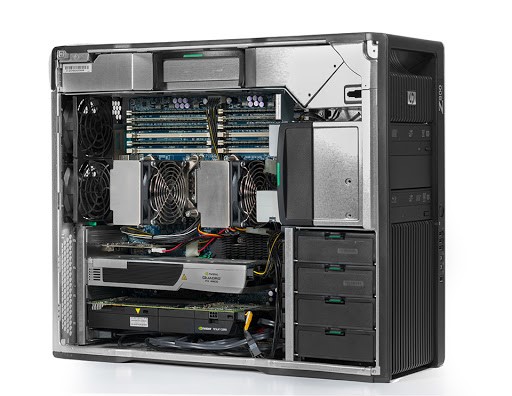
First we have to actually set the CPUs in the correct position I love the fact that I have to say CPUs multiple and not just one very excited to see how this PC performs the big issue with this motherboard is that it doesn’t have the triangle in the corner of the socket to kind of help you determine which way around you need to put the CPU in so you have to kind of match the pin array.
the actual socket which is obviously not ideal sorry I looked like there was some bent pins in that no I think no worry I’m going to clean them a bit better before I put a new thermal paste on and there’s no crunching sound when I close the actual CPU socket so that’s good all the pins.
Before finishing, I give the components a final wipe-down. Then I mount the CPU coolers.
I won’t use the small stock CPU coolers. them with two Black Edition Hyper 212 coolers. I chose these because someone else mounted them in this case successfully. There isn’t much clearance, but you can screw the standoffs directly into the motherboard backplate.
So that you don’t have to remove the motherboard from the case now unfortunately I’ve run into a little bit of a snag so over here is the actual kind of standoff that you have to screw into the motherboard to be able to mount that cooler master cooler and the actual hole for a standoff screwing in the back plate is a tiny bit too small I took the motherboard out because
I thought I could remove the backplate and use my own. The backplate is part of this socket, so I cannot remove it.
I see two options. First, I could use the stock coolers and be done, but that feels lame.
The second option is to drill the screw holes. That feels terrifying because it involves drilling into mounting hardware attached to the motherboard.
We should take a moment to appreciate that I figured out a way to mount it. With the AMD mounting hardware, the screws go through the back of the backplate. I’ll show this with some b-roll. The screw comes up through the base so you can attach the standoffs and mount the cooler.
Now it’s time to test the CPUs and see if the PC works.
In my first attempt with this configuration, the graphics card caught fire, as I mentioned earlier. I feel scared and won’t install a 1060 yet.
which I’m going to use eventually into the PC on the first try because I don’t want to destroy it so over here we have a sacrificial GPU it’s a GTX 285 and it’s not worth much so that’s kind of
why we’re gonna use that in the PC if it catches on fire it’s not going to be a disaster so let’s put it in there and see how it goes so now that I’ve effectively infuriated an ax plugged everything in including the sacrificial GPU hopefully it works
I really hope nothing catches fire because I’ve already spent so much time on this. I’m not even finished yet.
Looking at the PC, I see some cables in the fans. That already signals a potential problem.
I’m inserting the Windows USB drive. The system detects it immediately. I follow the installation prompts. The setup is quick and straightforward.
Once Windows installs, I update the drivers. The GTX 1060 works perfectly. The CPU and RAM perform as expected.
Next, I test the PC with Cinebench. The score matches expectations for this setup. Gaming benchmarks run smoothly at 1080p. The GTX 1060 handles most titles easily. The CPU does not bottleneck the performance.
I try overclocking, but the CPU cannot go higher. The stock cooler gets hot, so I keep temperatures in check.
Finally, I clean the case and mount the panels. The sanded and painted side panels look great. The PC is ready for use.
We want to test how it works and make sure it doesn’t damage graphics cards. I’m going to plug in the 1060.
We’re also going to paint the side panels because they have scratches. We will sand them and make them look clean and sleek. As you saw in the intro, we have the two panels ready.
I’m going to sand and paint it. I plan to film through the window, so it will look ghetto, but it’s just a quick time-lapse.
Before moving further, let’s cover the PC specs behind me. The CPU is two Intel Xeon X5675 six-core processors with a base clock of 3.05 GHz. There are 48 GB of RAM, which I don’t think is ECC. I use a GTX 1060 Palit Super Jetstream as the GPU. For storage, I have a 250 GB Samsung 860 Evo. I am using custom coolers for the setup.
I mentioned earlier that the Cooler Master Hyper 212 Black Edition fans did not attach as easily as I expected. When I finished mounting the coolers to the motherboard, I was excited to install the motherboard back into the case. Unfortunately, the grooves in the case’s backplate prevented it from fitting. I had to cut the backs of two square pins to make it slide in. It is debatable whether the effort was worth it, as this PC cannot fully…
This PC cannot overclock, but it runs very hot with the stock cooler. Upgrading the cooler still makes a difference.
First, let’s check Cinebench performance. The score is out, so now we can look at gaming benchmarks.
Before the final productivity test, let’s review the benchmarks. At 1080p, this PC performs well. The GTX 1060 handles most of the work. The CPU does not bottleneck the system too much.
A major issue remains: the CPU cannot overclock. At 3 GHz, each core is too slow. By comparison, my AMD Ryzen 1700 XCP, when overclocked, scores 1900 points in Cinebench. This PC cannot keep up. You can buy a 1700 XCP for relatively little money.
when overclocked can get a thousand nine hundred points in Cinebench. This PC just doesn’t keep up and honestly you can buy a 1700 x4 not very much money. And it would also perform a bit better in gaming honestly for 1080p 60 frames per second gaming available xfurbish.