The most effective method to Plant Seeds in Your Home Garden
Beginning from seed provides you with a more extensive cluster of plants to browse than you get at a nursery, and it permits you to observe your plants’ complete change into development.
Looking for the indoor farming and want seeds to grow plant, Then Organicrev is the online leading provider of organic growth stimulant that are 100% organic and works immediately. To know more about the products and prices Read OrganicRev Review and save more.
1. Select your seeds.
As a rule, the simplest plants to develop from seed are those with enormous seeds, including peas, beans, corn, squash, melon, and cucumbers. Many yields that grow from tiny seeds, including most greens, tomatoes, peppers, eggplants, broccoli, cauliflower, and Brussels sprouts, are more troublesome. A few little cultivated yields are a smidgen seriously lenient, like carrots, beets, radishes, and turnips. Bloom seeds like poppies, zinnias, nasturtiums, marigolds, and petunias are likewise brilliant choices for beginner grounds-keepers.
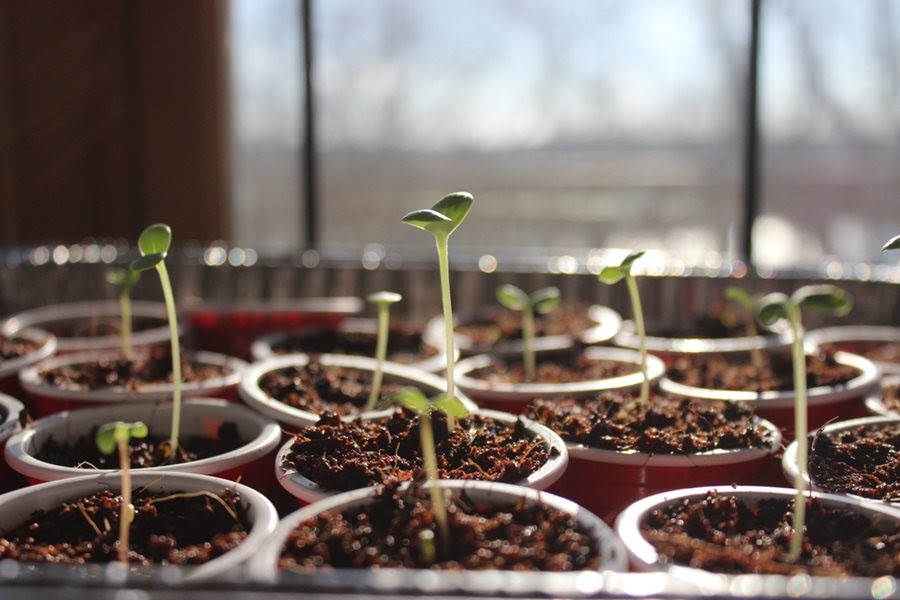
2. Pick a compartment.
Rather than planting seed straightforwardly in an outside garden bed-where birds and quite a few different critters might have them for supper, consider growing them inside. Dissimilar to coordinate planting, sowing seeds inside ensures your sources will be comfortable and safe, permitting you to start filling in pre-spring as you trust that the climate will warm. You can begin seeds in little pots or even egg containers (as long as you punch seepage holes). Seed beginning plates are a practical choice; these locally acquired seed plates regularly come furnished with a dampness vault cover and waste openings. Place a dribble plate under your compartment to get an abundance of dampness and soil.
3. Add seed beginning blend to your compartment.
Seed beginning blend is not the same as gardening soil, and on second thought contains peat greenery or coco coir, perlite, vermiculite, and manure once in a while. It gives incredible waste, makes it simple for fledglings to surface, and is sterile, so you don’t need to stress over contagious illnesses. Before filling the holders, you should initially dampen your beginning blend in with water. To know whether you have the best water to blend proportion, firmly press a modest bunch of combinations; on the off chance that water streams out, it’s excessively wet. On the off chance that no water comes out, it’s scorched. Assuming a couple of drops of water drop out, it’s perfect. When your beginning blend is appropriately saturated, fill your compartments inside a quarter-inch of the top and pack it so it’s immovably stuffed and level on top.
4. Plant your seeds.
Reference your seed parcel for directions on establishing profundity and dispersing. Assuming you’ve lost your seed parcel, a guideline is to cover a source two times, however profound, as it very well might be extended. Once covered, pack the dirt immovably with the center of your hand. Many kinds of little seeds-including snapdragon, petunia, and lettuce-expect light to grow, so you should leave these on a superficial level instead of covering them.
5. Cover your holder.
Encase your seeds with a layer of saran wrap or your seed starter plate’s plastic arch cover to secure the dampness and hotness essential for your roots to grow. It’s generally best to store your compartment in a warm area that gets circuitous daylight, yet consistently look at your seed parcel for explicit rules, as certain seeds require all-out dimness to develop. To accelerate the germination interaction, have a go at utilizing a hotness mat to warm the beginning blend from the base.
6. Water your seeds.
Consistently verify whether the beginning blend is as yet sodden. Don’t utilize a watering can if it seems dry because it may wash away the fragile seeds. Instead, either use a splash jug to shower a layer of fog over the blend surface or spot your holder in a giant plate of water so the blend assimilates water from underneath. When your seeds sprout, eliminate the cover from your compartment.
7. Care for your seedlings.
It includes keeping them in the proper temperature range as per their seed parcels and watering them consistently. Also, to the germination stage, the seed beginning blend ought to stay clammy without becoming oversaturated. Start preparing seedlings once their second arrangements of leaves are framed. These leaves are known as evident leaves and are a pointer that your seedlings plan to develop. To treat, weaken a fluid compost to one quarter the suggested measurements and manage it from a plate beneath the seedlings, so it absorbs through the waste openings. Try not to utilize manure, assuming your seed beginning blend contains fertilizer, as fertilizer gives supplements a critical measure.
8. Solidify off your seedlings.
Solidifying off alludes to the cycle where indoor seedlings are steadily presented to open-air conditions like colder temperatures, wind, and direct daylight, so they don’t go into shock because of the bumping change in the climate. Start this cycle around 10 to 14 days before your transfer date by setting your seedlings in an open-air spot shielded from wind and sun for an hour daily. Consistently, expand your seedlings’ time spent outside by one more hour and, bit by bit, open them to increasingly more daylight. For tough annuals, get the solidifying going interaction not long before the last ice so WHO can prepare your seedlings for the beginning of the developing season.
9. Relocate your seedlings outside.
When the climate is ideal for the most part just after the last ice of the period and your seedlings have acclimated to the outside, it’s a perfect opportunity to relocate them to an open-air garden bed or pot. Attempt to relocate when the sky is cloudy, if conceivable. Reference your seed bundle or a seed index to decide how much space in the nursery every seedling needs to develop. While setting a seedling in its new home, painstakingly spread out its fragile roots without harming them. In conclusion, water the seedling to permit its foundations to break into its new soil appropriately.