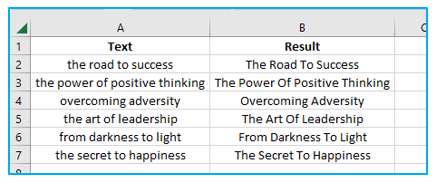
Excel is a powerful tool that is widely used for various data manipulation tasks, but it’s also a handy tool for text formatting. One common text formatting requirement is capitalising the first letter of each word in a cell or a column. This seemingly simple task can be quite useful, especially when working with names, titles, or any text data that needs to adhere to proper capitalisation rules.
Capitalising the first letter in Excel is a simple yet essential formatting task. It involves making the initial letter of each word in a cell or column uppercase while leaving the rest in lowercase. This is particularly useful for enhancing the professionalism and readability of text data, such as names, titles, or headings in spreadsheets.
Excel provides various methods to accomplish this, including using the “PROPER” function, employing Flash Fill for automatic recognition and formatting, or applying conditional formatting for visual changes without altering the actual data. Mastering this skill empowers users to create more polished and consistent documents, improving overall data presentation.
In this blog post, we will delve into the world of capitalisation in Excel and explore various techniques and tips to help you capitalise the first letters of your text data effortlessly. Whether you’re a seasoned Excel user or just getting started, mastering this skill can make your spreadsheets look more professional and save you time on manual formatting.
Understanding Text Capitalisation in Excel
Before we dive into the techniques, let’s understand the basics of capitalise the first letter in Excel. Excel provides a few functions and features that allow you to capitalise text in different ways. The three main types of text capitalisation are:
- Proper Case: This capitalises the first letter of each word in a cell while converting the rest of the letters to lowercase. It’s often used for names and titles.
- UPPER CASE: This converts all the letters in a cell to uppercase, which is useful when you want to emphasise text or make it stand out.
- Lower case: This converts all the letters in a cell to lowercase, useful for making text uniform and consistent.
Now, let’s explore how to achieve proper case capitalisation in Excel.
Using the PROPER Function (250 words)
Excel provides a handy function called “PROPER” that automatically converts text to proper case. To use this function, follow these steps:
- Select a cell where you want the proper case text to appear.
- Enter the formula “=PROPER(A1)” (assuming the text you want to capitalise is in cell A1).
- Press Enter.
Excel will automatically capitalise the first letter of each word in the selected cell, while converting the remaining letters to lowercase. You can then copy this formula down to apply it to multiple cells or columns.
Using Flash Fill
Another powerful feature in Excel for capitalising text is Flash Fill. Flash Fill is an automated data cleaning tool that can recognise patterns in your data and apply transformations accordingly. Here’s how to use Flash Fill for proper case capitalisation:
- Type the desired proper case format in a nearby cell, so Excel can recognise the pattern (e.g., enter the first name with proper capitalisation).
- Start typing the text you want to capitalise in the adjacent cell.
- After typing a few characters, Excel will display a “Flash Fill Options” button next to the cell.
- Click the “Flash Fill” button or press Ctrl + E, and Excel will automatically fill in the properly capitalised text based on your input.
Flash Fill is a fantastic tool for quickly capitalising text across a range of cells without the need for complex formulas.
Applying Conditional Formatting
In some cases, you may want to apply proper case capitalisation without changing the actual cell content. Excel’s Conditional Formatting feature can help achieve this. Here’s how:
- Select the range of cells you want to format.
- Go to the “Home” tab and click on “Conditional Formatting” in the “Styles” group.
- Choose “New Rule” from the dropdown menu.
- In the “New Formatting Rule” dialog box, select “Use a formula to determine which cells to format.”
- Enter the formula “=PROPER(A1)” (assuming the text you want to capitalise is in cell A1).
- Click the “Format” button to define the formatting style for the proper case text.
- Click “OK” to confirm the formatting settings.
Now, Excel will apply conditional formatting to capitalise the text visually, without changing the actual cell values.
Conclusion
Mastering text capitalisation in Excel is a valuable skill that can enhance the readability and professionalism of your spreadsheets. Whether you prefer using functions like “PROPER,” the convenience of Flash Fill, or the visual impact of conditional formatting, Excel offers multiple ways to achieve proper case capitalisation. Choose the method that best suits your needs and start making your Excel documents look more polished and presentable. With these techniques in your toolkit, you’ll be well on your way to boosting your Excel skills and working more efficiently with text data.


