You managed to get a Netgear EAX12 range extender, right? You’ve definitely made the right decision. This amazing piece of technology can be installed in any part of your home, giving you fast internet access everywhere. But are you familiar with how to use this device? If not, there’s no need to worry. This blog post explains three different methods to activate your extender. You are allowed to use any one of them whenever suits you best. However, given the first steps of the setup procedure are the identical for all three methods, we ask that you finish them before we reveal the setup techniques.
Setting Up the Netgear EAX12 Extender
Every Netgear device starts the setup process the moment it is unpacked. As a result, we advise that you open your EAX12 range extender. In order to prevent any harm to the attachment, you must unpack with great care.
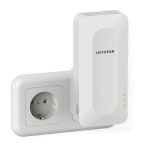
Choose a suitable spot for the extension as soon as you open the package. It’s got to be somewhere in your home’s center room. The space shouldn’t be very crowded, nor should it house several household appliances, reflective surfaces, or water-filled things.
Once the Netgear EAX12 extender has been unpacked and placed take a moment to go through the next section to discover various options for setting it up.
Methods to Set Up Netgear Extender EAX12
You are able to set up your WiFi device using any of the following methods:
1. WPS approach: With this approach, all the user needs to do is press the button. To utilise this strategy, though, the host router needs to support WPS setups.
2. Manual Method: To configure a range extender manually, users must first obtain access to the web-based management site.
3. Nighthawk App: People can use the Nighthawk mobile app to set up the device if they don’t have a WPS-compatible router or can’t use a computer to do it.
Let us now discuss how to install the EAX12 WiFi range extender using these methods.
Netgear EAX12 Setup Using WPS Method
The following are the steps you should take in order to use the WPS method to set up and operate your extender:
- Firstly, confirm that your range extender is within the primary router’s service area.
- Once both devices are inserted into their respective outlets, turn on the WiFi.
- Once they are powered on, begin searching for the “WPS” button on them.
- Found them? Actually? So, hit the router’s button after the Netgear EAX12’s button.
- Your range extender’s setup is now complete.
Netgear Extender EAX12 Setup via Manual Method
If using a web browser to customise your WiFi range extender sounds interesting to you, try the procedures listed below:
- Take an Ethernet cable and use it to connect your extension and router.
- Make sure your WiFi devices are receiving a consistent power source as well.
- After that, turn your attention to your laptop or PC and turn it on.
- Open a web browser that you frequently use.
- Enter mywifiext.net or mywifiext.local in the address bar and press Enter.
- The Netgear EAX12 extender’s leadership page will be displayed to you.
- Enter the necessary information here, then click Log In.
- Either the Status page or the BASIC Home screen appears.
- To finish the setup process, adhere to the on-screen instructions.
Netgear EAX12 Setup Using Nighthawk App
You can use the Nighthawk app to set up your Netgear extender more easily by following the instructions listed below:
- Unlock your smartphone after connecting and turning up your devices.
- Get the Nighthawk app by going to the app store on your phone based on the operating
- system.
- Open the app after it has finished installing.
- An account creation prompt for Netgear will appear.
- Fill out a form to create one [if you don’t already have one].
- Next, choose your Netgear EAX12 and enter the default password.
- The dashboard of the extender will be visible to you as soon as you log in.
- There, finish the setup by following the on-screen instructions.